Introduction
Learning how to use MIDI correctly was one of the most important things I have learned in my 15+ year music production journey. FL Studio is a powerhouse for music production, and one of its core features is its powerful use of MIDI. MIDI, or Musical Instrument Digital Interface, enables musicians and producers to harness the power of virtual instruments, control synthesizers, and bring their music ideas to life. In this blog, I will teach you exactly how to use MIDI in FL Studio, exploring its essentials and practical applications.
DOWNLOAD 30+ FREE SAMPLE PACKS - CLICK HERE

1. What is MIDI?
MIDI is a communication protocol that allows electronic instruments, computers, and software to exchange musical information. In the context of FL Studio, MIDI is the bridge that connects your creativity to a vast array of virtual instruments and synthesizers.
2. Setting Up MIDI Devices in FL Studio
Step 1: Connect Your MIDI Device:
- If you have a MIDI controller or instrument, connect it to your computer via USB or MIDI cables. FL Studio will automatically recognize most MIDI controllers.
Step 2: Configure MIDI Settings:
- In FL Studio, navigate to the "Options" menu, select "MIDI Settings," and ensure your MIDI device is detected. Configure the MIDI input and output settings as needed.
3. Creating a MIDI Channel
Step 1: Open the Channel Rack:
- In FL Studio, open the Channel Rack by clicking on the corresponding icon in the toolbar.
Step 2: Add a MIDI Channel:
- Right-click in the Channel Rack and select "Insert" to add a new channel. Choose a virtual instrument or synthesizer from the list.
Step 3: Open the Piano Roll:
- Double-click on the newly added channel to open the Piano Roll. This is where you'll be drawing, editing, and arranging your MIDI notes.
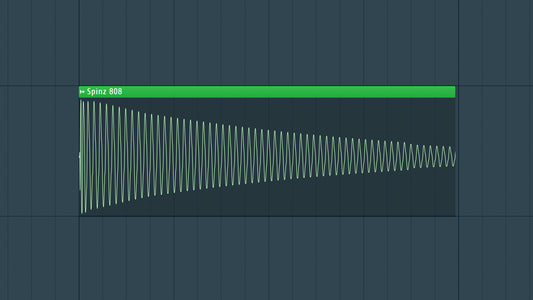
4. Drawing MIDI Notes
Step 1: Select a Note Length:
- Use the piano roll toolbar to choose the length of the note you want to draw. Click on the desired note length icon.
Step 2: Draw Notes:
- Click in the Piano Roll grid to draw MIDI notes. Experiment with different pitches to create melodic patterns.
Step 3: Adjust Note Properties:
- Drag the edges of the MIDI notes to adjust their length. Use the velocity control to alter the note's intensity.
5. Quantization
Step 1: Select Notes:
- Highlight the MIDI notes you want to quantize in the Piano Roll.
Step 2: Quantize:
- Press "Q" on your keyboard or right-click on the selected notes and choose "Quantize" from the menu. This aligns the notes to the nearest grid position for rhythmic precision.
6. Working with MIDI Patterns
Step 1: Save Patterns:
- In the Channel Rack, use the "Pattern Selector" to save and manage different MIDI patterns. This allows you to create dynamic sequences and arrangements.
Step 2: Arrange Patterns in Playlist:
- Drag and drop your saved MIDI patterns into the Playlist to arrange them into a complete composition.
7. Exploring MIDI Instruments and Synthesizers
Step 1: Load a Virtual Instrument:
- In the Browser, navigate to "Packs" or "Instruments" and drag a virtual instrument or synthesizer onto a new channel in the Channel Rack.
Step 2: MIDI Channel Settings:
- In the Channel Rack, click on the virtual instrument channel, and adjust its settings in the Channel Settings window. Assign the MIDI channel to the appropriate port and channel number.
8. Recording MIDI in Real-Time
Step 1: Enable Record Mode:
- Click the record button in the transport toolbar to enable record mode.
Step 2: Record Your Performance:
- Play your MIDI controller to record MIDI data in real-time. FL Studio will capture your performance in the Piano Roll.
9. MIDI Automation
Step 1: Open Automation Clip:
- Right-click on a parameter in a virtual instrument or effect plugin and choose "Create Automation Clip."
Step 2: Draw or Record Automation:
- In the Automation Clip, draw or record automation movements to control parameters dynamically over time.
10. Exporting MIDI
Step 1: Save Your Project:
- Regularly save your FL Studio project to preserve your MIDI compositions and settings.
Step 2: Export MIDI:
- If you want to use your MIDI patterns in other projects or share them, export MIDI clips by right-clicking on the clip in the Playlist or Channel Rack and selecting "Export" from the menu.
DOWNLOAD 30+ FREE SAMPLE PACKS - CLICK HERE
Conclusion
Congratulations! You've now learned exactly how to use MIDI in FL Studio. As you continue your music journey, remember that MIDI is a versatile language that adapts to your creative vision. Experiment, improvise, and let the endless possibilities of MIDI fuel your musical journey in FL Studio. Happy producing!